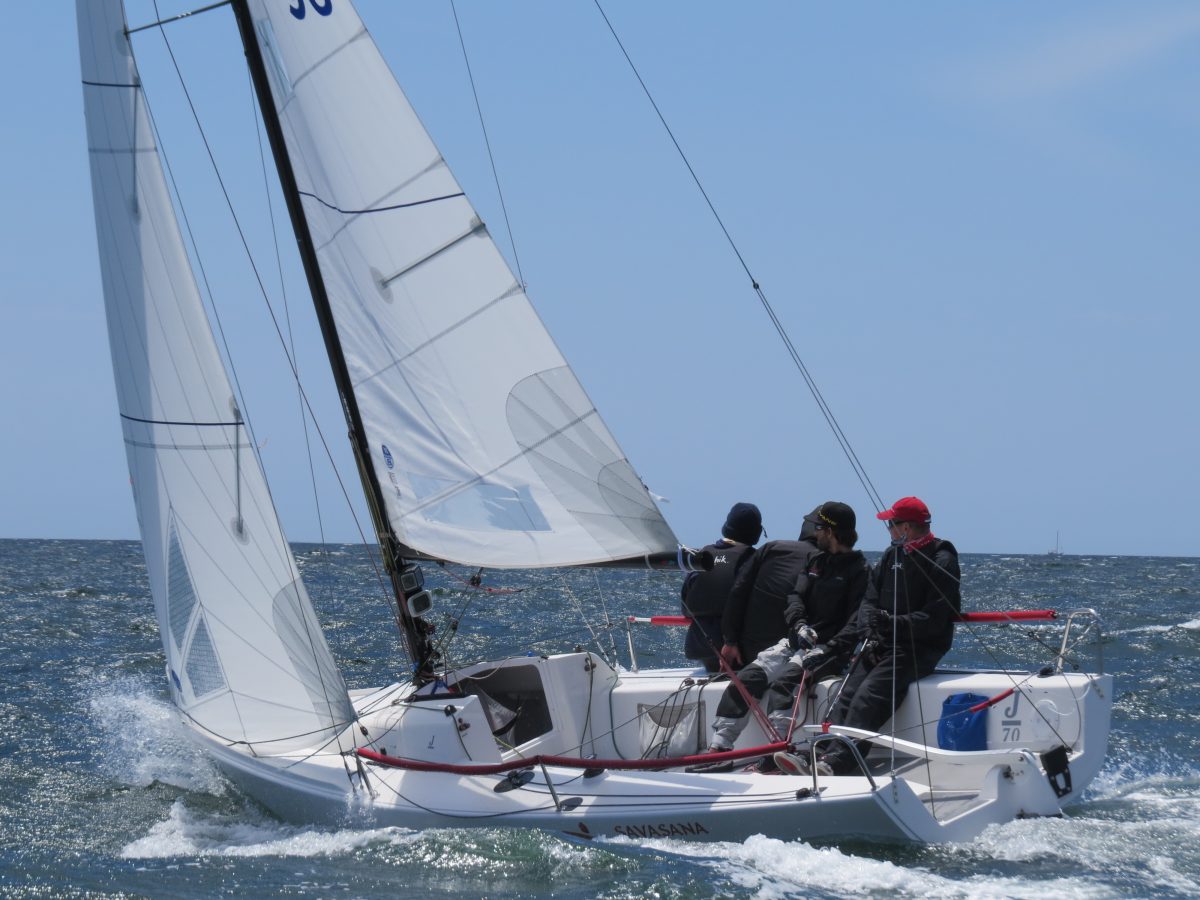
Trimming the jib on the J/70 involves both technique and accuracy. Proper jib trim will help balance the boat and help in boat speed and pointing ability. While achieving the proper trim is the goal, being able to repeat the trim consistently will also make a big impact on your boat’s performance. The important factors in proper jib trim are the lead car position, jib sheet tension, in-hauler tension, jib halyard tension and reference marks to repeat all the settings. The final trim position for the J/70 jib is a balance between the sheet tension and in-hauler tension.
When the jib is trimmed in, the leech of the jib should be lined up with the spreader stripes (between 18”-22” from the side of the mast). Within this range, your upper jib leech telltale should be flowing 90-100% of the time. Trim in until it just stalls then ease a hair until it starts flowing again. This is your max trim.
Jib Car Position
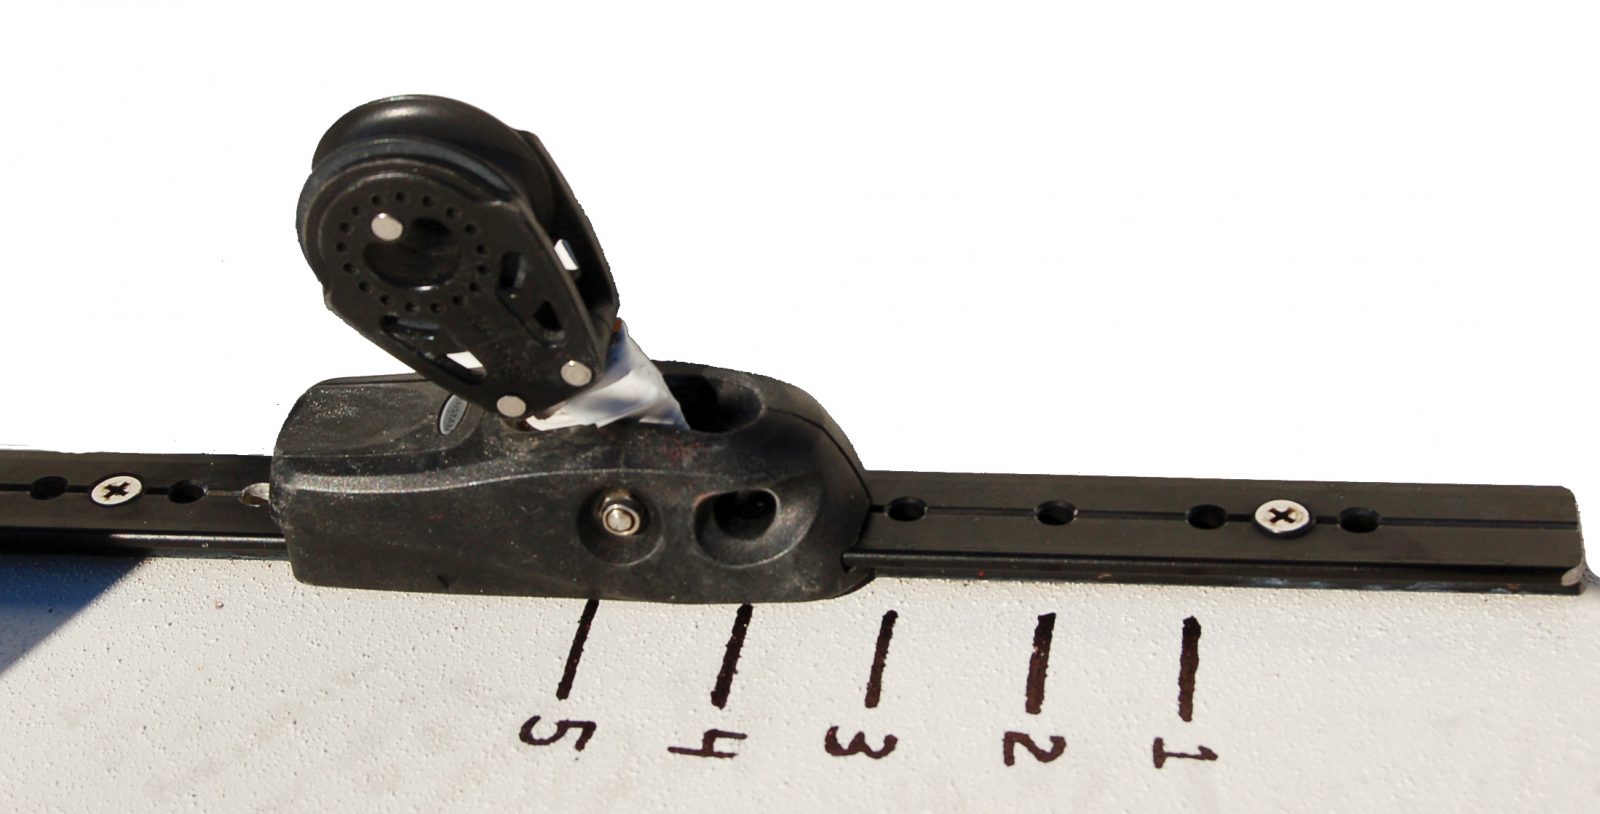
The first step in jib trim on the J/70 is jib lead car position. Setting this position is important as it affects all of the other settings. Combining the jib lead car position with the amount of sheet tension, in-hauler and halyard tension allows the trimmer to manipulate the sail to fit the conditions and style of the skipper. When discussing the position of the jib lead car, we reference the number of holes visible behind the first deck mounting screw in front of the car once in a position.
Windward Sheet
On the J/70, we use the windward, or lazy jib sheet as an ‘in-hauler’ to pull the clew of the jib to windward and more inboard. When setting the in-hauler tension, our reference point is the distance the clew of the jib is away from the side of the cabin house.
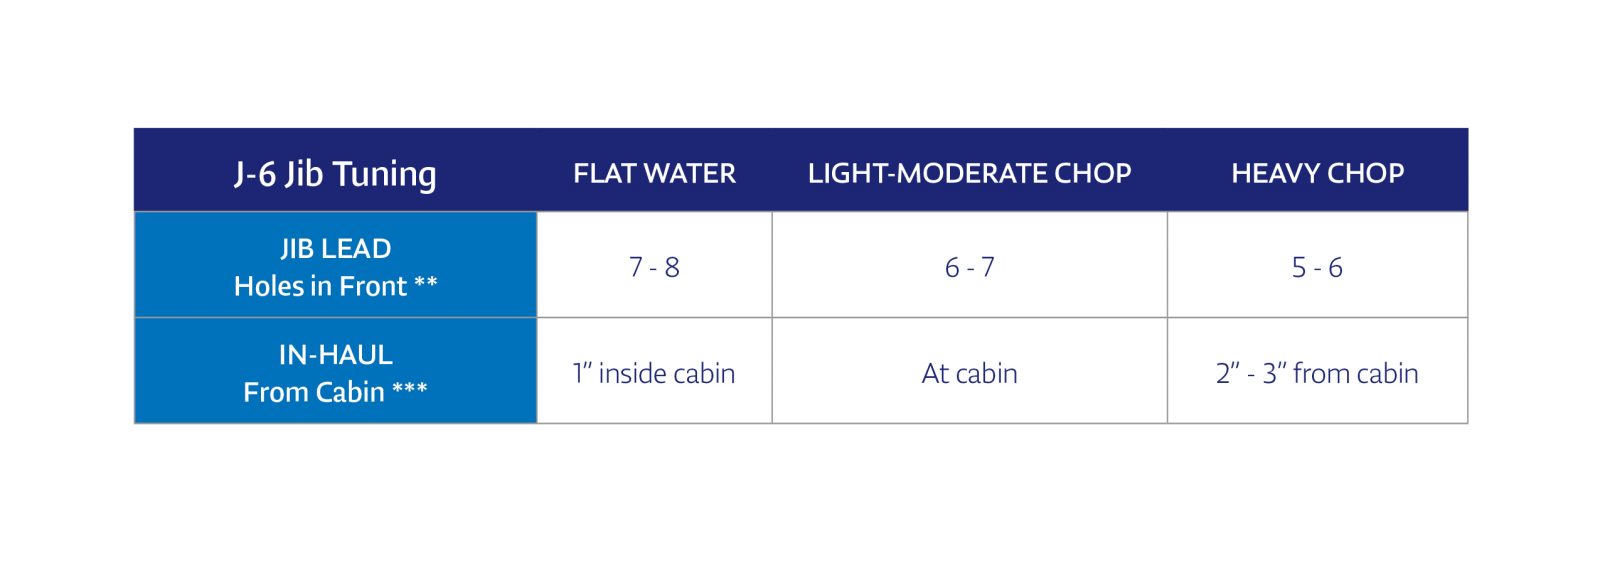
J-6 Jib: For the J-6 some in-hauler is always required. In very choppy conditions, use less in-hauler with the clew at 2”-3” from the cabin house and the lead at 5-6 holes showing. In light to moderate chop the clew can be at or just inside the cabin house with the lead at 6 -7 holes showing. In very flat water the lead can go back more to 7-8 holes showing.
J-2 Jib: Our go to setting for the J-2 is 2” from the cabin house. In Flat water we may go to 1” away and in moderate chop conditions 2.5-3.5”. In big waves and chop we may go with no in-hauler. Remember that the less in-haul is used, the farther forward the jib car needs to be.
For the J-2 jib with no in hauler, the car should be around 3-4 holes showing and with a lot of in-hauler on and the jib clew is at 1” from the cabin house, there should be 5-6 holes showing in front.
Jib Halyard
The jib halyard on the J/70 is rigged with a fine tune purchase that can be adjusted while sailing. In lighter winds, the jib halyard should be set so that there are slight wrinkles appearing in the first panel along the luff of the sail (approx. 4-8” back from luff of sail). If wrinkles extend further back in the sail, or no wrinkles appear at all, the halyard should be adjusted to compensate. As the wind gets stronger, and the sails need to be de-powered, the jib halyard should be tightened just to the point where the wrinkles along the luff disappear. As the halyard is tightened and loosened, it is important to keep in mind that the halyard tension also affects the leech tension of the jib and the sheet and/ or in-hauler may need to be adjusted to compensate.
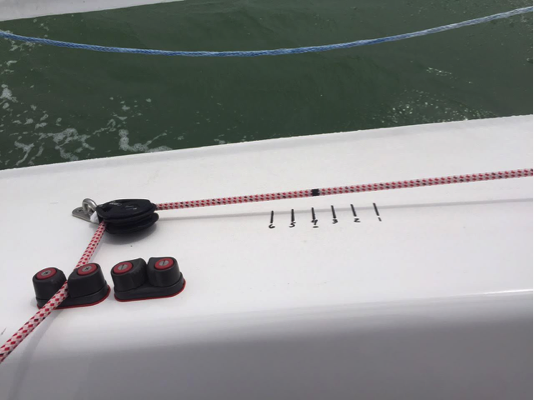
Make Marks
Make reference marks on jib sheets for both the sheet tension and in-hauler tension. Having reference marks will make it much easier to duplicate your trim settings quickly. Jib sheet and deck reference marks help accurately repeat trim settings It is a good idea to experiment with different settings for each control to get used to how each control affects the sail and how they interact with each other
The basic effect of the three jib controls, lead car position, in-hauler and jib halyard is:
Jib Lead Car Position
Forward = Tighter leech, round foot
Aft = Open leech, flat foot
In-hauler
More = Tighter leech, round foot
Less = Open leech, flat foot
Jib Halyard
More = Flatter sail
Less = Deeper sail
* Counting the number of open holes in front of the jib lead car and after the first bolt identifies jib lead position.
*** The distance (in inches) from the clew of the jib to the side of the cabin identifies in-haul measurement. Use less In-Haul when lead is forward and more in-haul when lead is aft.
After setting the sheeting position of the jib, the trimmer needs to constantly check to ensure the trim remains correct as the conditions change. Since the jib on the J/70 is high aspect (tall and thin) changes in the conditions have a significant impact on the trim of the sail. For this reason, there are telltales attached to the upper leech of the jib to help the trimmer know when the sail is going to stall. When the sail is trimmed properly for upwind, the leech telltales will be flowing and if the telltales begin to stall, the sail will need to be adjusted to regain the flow. Most often, only a small adjustment is needed to help return the proper trim and flow to the sail. The reference marks on your spreaders will also help with jib trim. You will find that in 10+knots in flat water you may be able to sheet so the jib leech is at the inside, 18” spreader mark and the leech telltale is still flowing. When it is light and lumpy you will find that the leech will need to be closer to the outside 22” spreader mark. Easing the jib sheet slightly is the first step in returning flow to the jib. Normally, this will only require an inch (or less) of sheet to be eased out. If the leech telltales continue to stall when the leech is sheeted in to the spreader stripes, other adjustments need to be made to properly trim the sail. Since the telltales indicate the stalling of the upper leech of the sail, adding twist is likely the solution. The two ways to best achieve more twist in the jib, is to move the lead car aft and use less sheet tension. As described earlier, both adjustment will add twist to the sail and help regain the twist and flow at the top of the sail.
Other J/70 Speed Resources:
J/70 Speed Guide
J/70 Full Tuning Guide
J/70 XCS-1/J-6 Quick Tuning Chart
STORY CONTRIBUTORS

TIM HEALY
One Design Expert — Portsmouth, Rhode Island
Tim has won 18 major titles including two World Championships in the J/24 class. A three-time All-American Sailor at St. Mary’s College in Maryland, Healy also won a Gold Medal at the 2003 Pan American Games.